The following things can be done after installing centos 7 on your dedicated or vps server:
1. Update and upgrade centos
[vedant@root]# yum upgrade
This command will inform you about the packages that can be updated or upgraded. To install the update just run the command:
[vedant@root]# yum install update
2. Install a command-line web browser
This is because most of the CentOS server has no GUI. Therefore in order to check the website, through the terminal, we must have to install a command-line web browser.
[vedant@root]# yum install links
3. Install wget & 7-Zip
wget is a command-line tool that retrieves or downloads the content from the web servers. 7-Zip is used to compress and extract the files of zip format.
[vedant@root]# yum install wget
[vedant@root]# yum install p7zip
4. Install Development Tools
Development tools are installed if you have planned to build software. Development tools basically consist of tools like GCC, g++, make, Autoconf, libtool, bison, flex, rpmbuild, etc packages.
To find out the packages list that will be the development tools group.
[vedant@root]# yum groupinfo "Development Tools"
To install the development tools run the following command:
[vedant@root]# yum update
[vedant@root]# yum groupinstall "Development Tools"
After installing the development tools you can check the important binaries.
[vedant@root]# gcc –version
[vedant@root]# make –version
5. Install Apache HTTP Server
HTTP server is the most widely used web server, whenever it comes to host websites on your VPS server. This is basically used to run websites, multimedia, client-side script, and many other things.
To install httpd server run the command as follows:
[vedant@root]# yum install httpd
Then press ‘Y’ to install the httpd server.
After that start the httpd server using the following command:
[vedant@root]# systemctl start httpd.service
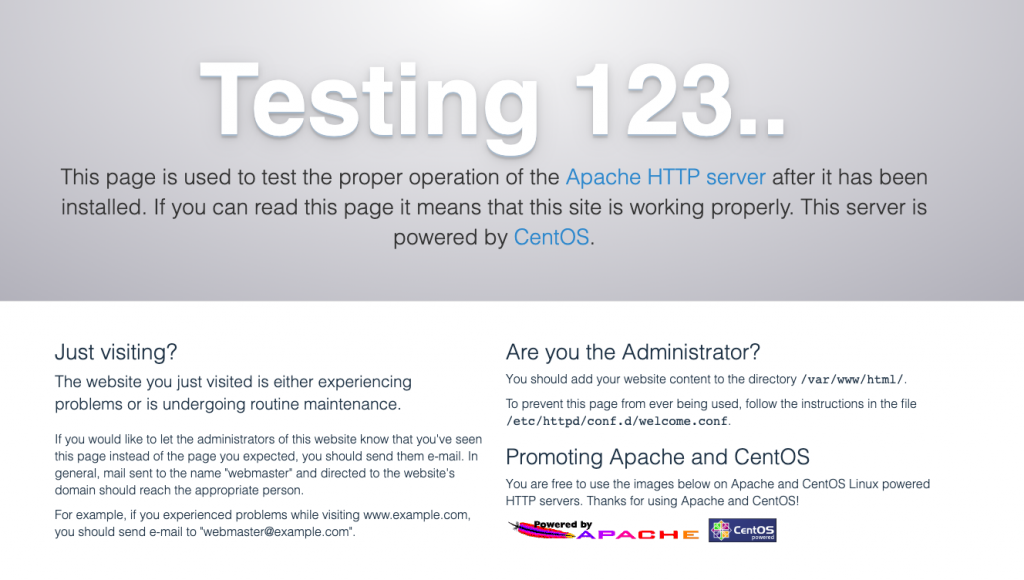
In order to verify that httpd server is installed on your server, then open your browser and type your server ip http://101.132.97.75/ then you will see a page as shown below:

If you want httpd server to start automatically when the system boots then use this command:
[vedant@root]# systemctl enable httpd.service
In order to restart and stop httpd server uses the command as follows:
[vedant@root]# systemctl restart httpd.service
[vedant@root]# systemctl stop httpd.service
6. Install PHP
PHP is a server-side scripting language that is used for web-based services. Command to install PHP are as follows:
[vedant@root]# yum install php
After installing PHP make sure to restart httpd server:-
[vedant@root]# systemctl restart httpd.service
To verify PHP is installed or not just type
[vedant@root]# php -v
It will show the PHP version.
7. Install MariaDB Database
MariaDB is a fork of MySQL. RedHat Enterprise Linux and its derivatives have shifted to MariaDB from MySQL. It is the Primary Database management System. It is again one of those tools which are necessary to have and you will need it sooner or later no matter what kind of server you are setting. Command to install MariaDB on your server are as follows:
[vedant@root]# yum install mariadb-server mariadb
Then press ‘Y’ to install MariaDB on your server.
Start and configure MariaDB to start automatically at boot.
[vedant@root]# systemctl start mariadb.service
[vedant@root]# systemctl enable mariadb.service
Now it’s time to secure the MariaDB server.
[vedant@root]# /usr/bin/mysql_secure_installation
Then you will be prompted for the password and some common questions for security.
8. Install Java
java is object-oriented programming language and it is not installed on your server by default. So, therefore you will have to installed it:
[vedant@root]# yum install java
Check version of Java Installed.
[vedant@root]# java -version
9. Install Apache Tomcat
Tomcat is a servlet container designed by Apache to run a Java HTTP web server. Install tomcat as below but it is necessary to point out that you must have installed Java prior to installing tomcat.
[vedant@root]# yum install tomcat
After tomcat has been installed, start the tomcat service.
[vedant@root]# systemctl start tomcat
To start tomcat automatically when the system boots up:-
[vedant@root]# systemctl enable tomcat.service
Now the tomcat has been successfully installed on your server. The default tomcat directory is /etc/tomcat
10. Install unzip
Enter the following command to install Unzip:
[vedant@root]# yum install unzip
To verify whether Unzip is installed correctly, run the following commands:
[vedant@root]# unzip -v
Now you can unzip any zip file as follows
[vedant@root]# unzip test.zip